Time Manager Personalization can be accessed through the DELMIA Apriso Portal and the DELMIA Apriso Desktop Client. It contains the following sections:
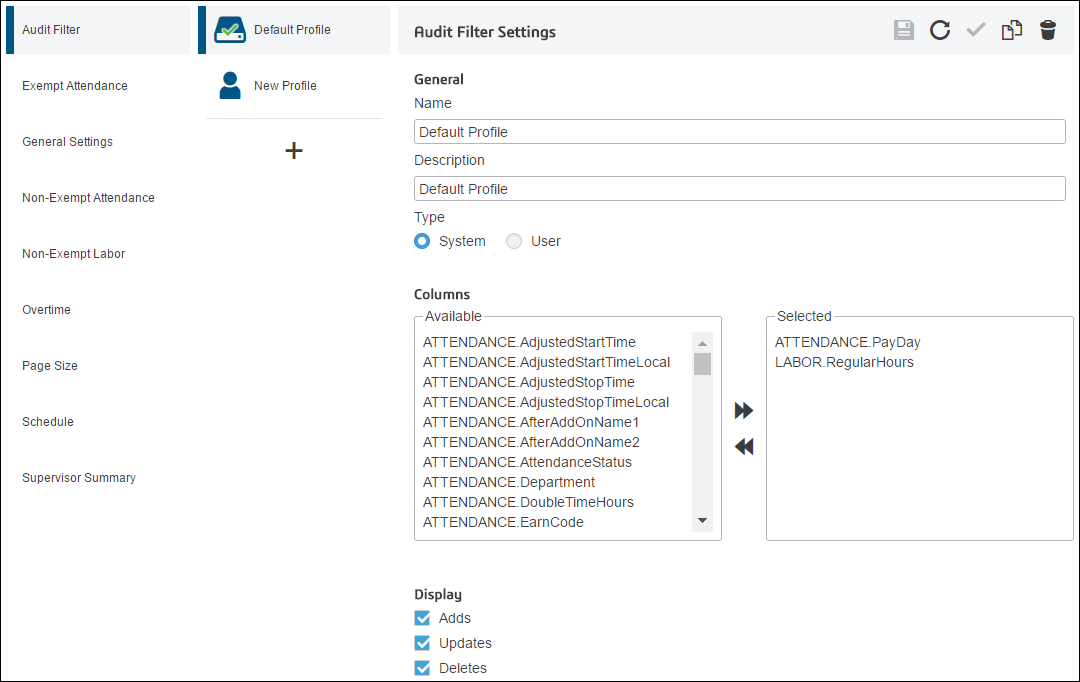
Create profiles to easily switch between different Audit Filter settings. Click a profile to view and edit that profile. The following actions are possible:
| Icon | Action type |
|
|
Create a new profile. |
|
|
Save the selected profile. |
|
|
Reload the selected profile. |
|
|
Set the selected profile as default. |
|
|
Copy the selected profile. |
|
|
Delete the selected profile. |
Two types of profiles are available:
You can also edit the Columns displayed on the Audit grid:
To assign a column, drag that column from the Available
list to the Selected list. Click
 to move all Available columns
to the Selected list.
to move all Available columns
to the Selected list.
To unassign a column, drag that column from the Selected
list to the Available list. Click
 to move all Selected columns to
the Available list.
to move all Selected columns to
the Available list.
To reorder a column, drag that column to its new location in the Selected list.
You can configure what data is displayed using the Display settings:

In this section, you can define the general settings for the way the grids are displayed in Time Manager. The following actions are possible:
| Icon | Action type |
|
|
Save the settings. |
|
|
Reload the settings. |
The following settings can be modified:
| Attribute | Description |
| Time Format |
The hh:mm format is supported only for Exempt Employee time entry columns. |
| Load Defaults | This check box determines if an employee’s default entries are automatically merged with the current Pay Period data. An alternative to this setting is manually loading the defaults as required. |
|
Show Comment Text |
|
| Expanded Grids | Enables individually setting which grids will be automatically expanded on the initial page load. |
Grid personalization enables personalizing the look and feel of the lists in Time Manager according to your needs. Using the grid configuration, you can:
Create profiles to easily switch between different grid settings. Click a profile to view and edit that profile. The following actions are possible:
| Icon | Action type |
|
|
Create a new profile. |
|
|
Save the selected profile. |
|
|
Reload the selected profile. |
|
|
Set the selected profile as default. |
|
|
Copy the selected profile. |
|
|
Delete the selected profile. |
Two types of profiles are available:
You can also edit the Columns displayed on the grid:
To assign a column, drag that column from the Available
list to the Selected list. Click
to move all Available columns
to the Selected list.
To unassign a column, drag that column from the Selected
list to the Available list. Click
to move all Selected columns to
the Available list. Required columns
( )
can not be unassigned.
)
can not be unassigned.
To reorder a column, drag that column to its new location in the Selected list.
It is possible to sort the order of the displayed data by building simple conditions using the Order lists.
To assign a column for ordering, drag that column from the Available
list to the Selected list. Click
to move all Available columns
to the Selected list. Drag to
reorder selected columns, and click their corresponding icons to change
between ascending ( ) and descending (
 ).
).
To see any new profiles or updates to the existing profiles, restart DELMIA AprisoServices.
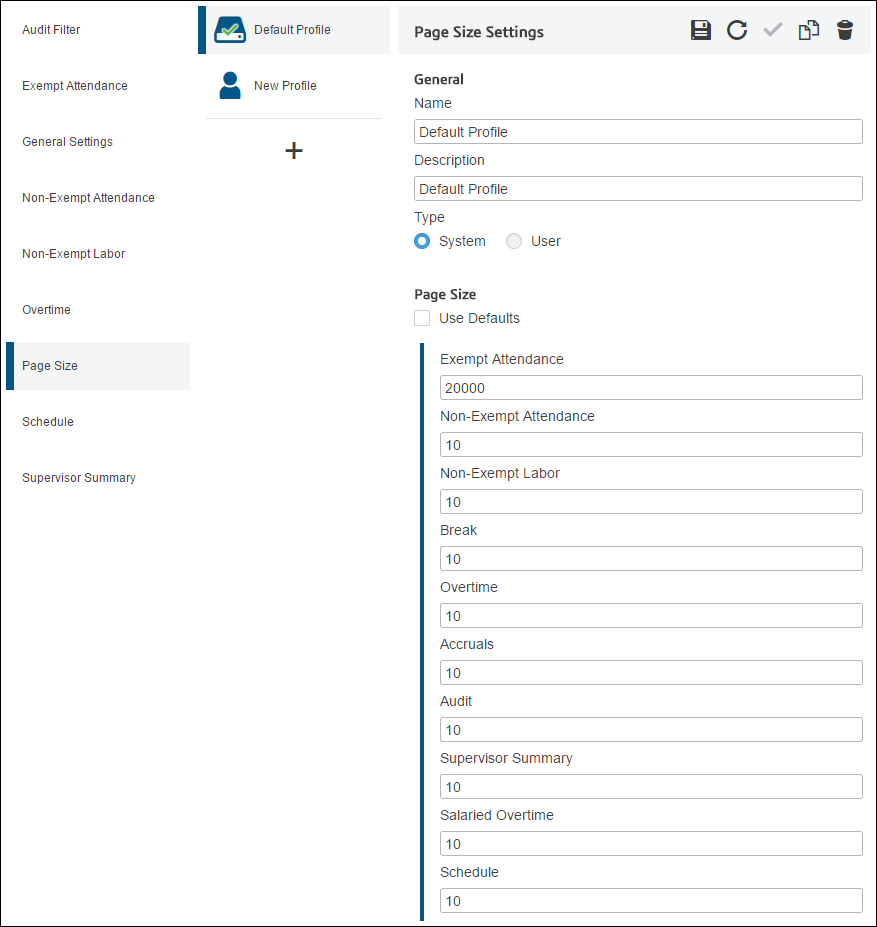
Create profiles to easily switch between different Page Size settings. Click a profile to view and edit that profile. The following actions are possible:
| Icon | Action type |
|
|
Create a new profile. |
|
|
Save the selected profile. |
|
|
Reload the selected profile. |
|
|
Set the selected profile as default. |
|
|
Copy the selected profile. |
|
|
Delete the selected profile. |
Two types of profiles are available:
The Page Size section controls how many records appear on each grid until paging occurs (that is, how many records in a grid per page). Enable Use Defaults to use the default number for each grid (which is 10), or disable this settings to configure the page size for each grid.


 ) in the comment
column (if a comment exists)
) in the comment
column (if a comment exists)